
Hosting web content has a mainstay of AWS for many years. From running your own Virtual Machine, with your favourite web software, to load balancing web traffic, DNS from Route53 and CDN from CloudFront, it’s been one of the world’s preferred ways to publish content for over a decade.
But these days, it’s the Serverless suite of services that help make this much cheaper, faster, more scalable, and repeatable. In this article, we’ll show how we can host a vast number of websites. We’ll also set a series of security features to try to get as secure and available as possible, even though we’ll be allowing anonymous access.
In a future post, we’ll dive through setting up a complete CI/CD pipeline for the content of your websites, with Production and non-production URLs for workflow review and acceptance.
High Level Features
- No application servers to manage/patch/scale
- Highly scalable
- Globally available (cached)
- IPv4 and IPv6 (dual-stack)
- HTTP/2 (request multiplexing, and compressed request headers)
- Brotli compression, alongside gzip/deflate
- TLS 1.2 minimum; strong rating on SSLLabs.com
- Modern security headers: strong rating on securityheaders.com
Basic Architecture
The basic architecture of the content is:
- An S3 bucket to host our S3 Access Logs (from the below content bucket) and the CloudFront Access Logs we will be making
- An S3 Bucket to host the file (object) content
- A CloudFront distribution, with an Origin Access Identity to securely fetch content from S3.
- A TLS certificate, issued from Amazon Certificate Manager with DNS validation
- DNS in Route53 (not strictly necessary, but it makes things easier if we have control of our own domain immediately, and we can handle CloudFront at the APEX of a DNS domain (ie, foo.com) with ALIAS records)
While there is a lot to configure here there are no Servers to administer, per sé. This means the scaling, OS patching, and all other maintenance activities are managed – so we can get on with the content.
A Canonical URL
It is strongly recommended to have one hostname for your website. While you can have multiple names in a TLS certificate and serve the same content, you’ll get down-weighted in search engines for doing so, and it’s confusing to users.
In particular, you need to decide if the URL your users should get your content from is www.example.com, or just example.com. Choose one, and stick to it; the other should be a redirect if you need to (as a separate, almost empty, website). Indeed, there’s a CloudFront Function or Lambda@edge function you can write to do your redirects.
Don’t be tempted to use an S3 Bucket for your web redirections, as there’s a limit on the number of S3 Buckets you can have, and you can’t customise the TLS certificate or TLS profile (protocols, ciphers) on S3 website endpoints directly.
S3 Logging Bucket
This is the destination of all our logs. The key element is the automated retention (S3 lifecycle) policy – we want logs, but we don’t want them forever! Some keys points:
- S3 Versioning enabled
- S3 Lifecycle policy, delete current objects after 365 days, and previous revisions after 7 days (just in case we have to undelete).
- Default encryption, Amazon S3 master-key (SSE-S3)
- Ironically, probably no server access logging for this Bucket; otherwise if we log server access to the same bucket, we end up with an infinite event trigger loop
- Permissions: Block Public Access
- Object ownership: Bucket Owner preferred
- Permit CloudFront to log, using the canonical ID shown here
- Permit S3 logging for the Log Delivery permission
S3 Content Bucket
Again we want to Block Public Access. While that may sound counter-intuitive for a public-facing anonymously accessible website, we do not want external visitors poking around in our S3 Bucket directly – they have to go via the CloudFront Distribution.
S3 does have a (legacy, IMHO) website hosting option, but it hasn’t traditionally given you access to have a custom TLS certificate with your own hostname, nor permitted you to restrict various compression and TLS options – that’s what CloudFront lets us customise.
The basic configuration of the Content S3 Bucket is:
- S3 Versioning enabled (hey, it’s pretty much a standard pattern)
- S3 Lifecycle Policy, to only delete Previous revisions after a period we’d use for undelete (7 days)
- Default encryption, Amazon S3 master-key (SSE-S3)
- Access logs sent to the above Logging Bucket, with a prefix of /S3/content-bucket-name/. Note to include the trailing slash in the prefix name, otherwise, you’ll have a horrible mess of object names
- Permissions: Block Public Access (CloudFront Origin ID will take care of this)
- We’ll come back later for the Bucket Policy…
ACM Certificate
The next component we need to start with is a TLS Certificate; we’ll need to be already available when we set up a CloudFront distribution.
ACM is pretty simple: tell it the name (or names) you want on a certificate, and then ensure the validation steps happen.
My preference is DNS validation: once the secret is stored in DNS, then subsequent re-issues of the certificate get automatically approved, and then automatically deployed.
Ideally, your website will have one, and only one, authoritative (canonical) DNS hostname. And for that service, you may want to have just one name in the certificate. It’s up to you if you want the name to be “www.domain.com”, or just “domain.com”. I would avoid having certificates with too many alternate names, as any one of those names having its DNS secret removed will block the re-issuance of your certificate.
Lambda@Edge
There are two major functions we’ll use Lambda@Edge: one to transform some incoming requests, and one to inject some additional HTTP headers into the response.
All Lambda@Edge functions need to be created in us-east-1; and the CloudFront service needs access to invoke them.
Handling the default document in sub-prefixes
CloudFront as a CDN has the concept of a default object, a file name that can be fetched when no filename is supplied. Historically (as in, before IIS existed), this was index.html (if you’re wondering index.htm came about, then you probably don’t recall Microsoft DOS and Windows with its 8.3 filename limits). However, the configuration setting only applies to one request URL: the root object, or “/”. It does not cater for “subdirectories” or folders, which is often not what’s needed; in which case, when a path of “/foo/”. is requested, then we want to update the request that will hit the origin (S3) to “/foo/index.html”., and mask the fact we’ve done this.
As of May 2021, CloudFront also has a new code execution service, CloudFront Functions. This would be suitable for this purpose as well.
Here’s a simple Node.JS to achieve this:
const path = require('path')
exports.handler = (event, context, callback) => {
  const { request } = event.Records[0].cf
  const url = request.uri;
  const extension = path.extname(url);
  if (extension && extension.length > 0){
    return callback(null, request);
  }
  const last_character = url.slice(-1);
  if (last_character === "/"){
    return callback(null, request);
  }
  const new_url = ${url}/;
  console.log(Rewriting ${url} to ${new_url}...);
  const redirect = {
    status: '301',
    statusDescription: 'Moved Permanently',
    headers: {
      location: [{ key: 'Location', value: new_url}],
    },
  };
  return callback(null, redirect);
};
Injecting HTTP Security Headers
The second function we will want is to inject additional HTTP headers to help web clients (browsers) to enforce stricter security. There’s a set of headers that do this, some of which need customising to your site and code:
'use strict';
exports.handler = (event, context, callback) => {
  function add(h, k, v) {
    h[k.toLowerCase()] = [ { key: k, value: v } ];
  }
  const response = event.Records[0].cf.response;
  const requestUri = event.Records[0].cf.request.uri;
  const headers = response.headers;
  add(headers, 'Strict-Transport-Security', "max-age=31536000; includeSubdomains; preload");
  add(headers, 'Content-Security-Policy', "default-src 'self'; img-src 'self' data: ; script-src 'self' 'unsafe-inline' 'unsafe-eval' ; style-src 'self' 'unsafe-inline'; object-src 'none'; frame-src 'self' ; connect-src 'self' ; frame-ancestors 'none' ; font-src 'self'; base-uri 'self'; manifest-src 'self'; prefetch-src 'self' ; form-action 'self' ;");
  add(headers, 'X-Content-Type-Options', "nosniff") ;
  add(headers, 'X-Frame-Options', "DENY") ;
  add(headers, 'Referrer-Policy', "same-origin") ;
  add(headers, 'Expect-CT', "enforce, max-age=7257600") ;
  add(headers, 'Permissions-Policy', "geolocation=(), midi=(), notifications=(), push=(), sync-xhr=(self), microphone=(), camera=(), magnetometer=(), gyroscope=(), speaker=(), vibrate=(), fullscreen=(), payment=(), autoplay=(self)");
  delete headers['server'];
  if (requestUri.startsWith('/assets/')) {
    add(headers, 'Cache-Control', 'max-age=15552000');
  } else if (requestUri.endsWith(".jpg")) {
  add(headers, 'Cache-Control', 'max-age=1209600');
  } else if (requestUri.endsWith('.html')) {
  add(headers, 'Cache-Control', 'max-age=43200');
  }
  callback(null, response);
};
The exact headers that are recommended changeover time, as the state of capability in the commonly deployed (and updated) browsers change.
The most important header is the HSTS, or Hypertext Strict Transport Security, which informs clients that your service on this hostname should always (for the time period specified) be considered HTTPS only.
Next on my list of security headers is the Permissions Policy, formerly the Feature Policy. This administratively disables some capability that browsers can surface to web applications, such as the ability to fetch fine-grained location or use a device’s camera. Typically we don’t want any of this, and we probably wouldn’t want any introduced JavaScript (possibly coming from a 3rd party site) to try this.
The most specific header, which truly needs customising to your site’s content and structure, is the Content Security Policy, or CSP. This permits you to express in great detail the permitted sources for content to be loaded from, as well as where your content can be embedded into (as iframe content in another page), or what it can embed (as iframe content within your page).
As of May 2021, CloudFront also has a new code execution service, CloudFront Functions. However, this would have to be executed every time an object is served to a client, as at this time, CloudFront Functions can not hook into the request life cycle at the Origin Response phase. The difference is important: these static headers can be executed once and attached to a cached object, and then served an infinite number of times.
CloudFront Origin Identity & S3 Content Bucket Policy
An Origin Access Identity is a way to permit CloudFront edge locations to make authenticated calls against an S3 Bucket, using credentials that are fully managed, dynamic, and secure.
An Origin Access Identity has one attribute, a “comment”., which we’ll call “Website-Bucket-Access”. In response, we’ll get an ID, as shown here:
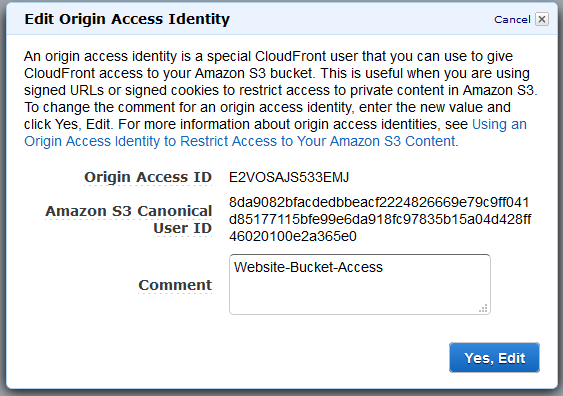
We can now go back to the S3 console, and update our Content Bucket with a Policy that permits this ID to be able to Get objects (it only needs Get, not List, Put or anything else).
{
  "Version": "2008-10-17",
  "Id": "PolicyForCloudFrontPrivateContent",
  "Statement": [
    {
      "Sid": "1",
      "Effect": "Allow",
      "Principal": {
"AWS": "arn:aws:iam::cloudfront:user/CloudFront Origin Access Identity E2VOSAJS533EMJ"
    },
    "Action": "s3:GetObject",
    "Resource": "arn:aws:s3:::my-bucket-for-websites/*"
    }
  ]
}
CloudFront Distributions
Each web site requires its own CloudFront distribution, with a unique origin path within our S3 Content Bucket that it will fetch its content from. It will also have a unique Hostname, and a TLS certificate.
In order to facilitate some testing, we’re going to define two Distributions per web site we want: one for Production, and one for Testing. That way we can push content to the first S3 Bucket, ensure that it is correct, and then duplicate this to the second (production) location.
To make this easier, we’re going to use the following prefixes in our Content S3 Bucket:
/testing/${sitename}/production/${sitename}
For the two distributions, we’ll create one of test.sitename, and the production one with just the target sitename we’re after.
In this case, we’re using the same AWS account for both the non-production and production URLs; we could also split this into separate AWS accounts (and thus duplicate a separate S3 bucket to hold content, etc). We can also add additional phases: development, testing, UAT, production. One deciding factor is how big a team is working on this: if it is just one individual, two levels (testing, production) is probably enough; if a separate team will review and approve, then you probably need an additional development environment to keep working while a test team reviews the last push.
Here’s the high level configuration of the CloudFront distribution configuration:
- Enable all locations – we want this to be fast everywhere.
- Enable HTTP/2 – this compresses the headers in the request, and permits multiplexing of multiple requests over the one TCP connection
- Enable IPv6 as well as IPv4 – significant traffic silently falls back to IPv4, and the deployment is easy, fast, and doesn’t cost anything. Note that you need to create both an A record in DNS, and an AAAA record (ALIAS in Route53) for this; just ticking the IPv6 option here (or in the template) does not make this work by itself.
- For the default behaviour, set up an View Request handler for the default document rewrite lambda in US East, and the Security Header injection on Origin Response.
- Set logging to the S3 log bucket, in a prefix of “CloudFront/${environment}/${sitename}
- Enable compression
- Redirect all requests to HTTPS; one day in a few years time this wont be necessary, but for now….
- Only permit GET and HEAD operations
- Set the Alternate Domain name to the one in your ACM certificate, and assign the ACM certificate to this distribution
Template the steps
In order to make this as efficient as possible, and support maintenance in a scalable way, we’re going to template these. Lets start with these template ideas:
Shared Templates (only one instantiation)
- CloudFront Origin Identity – used by all CloudFront distributions to securely access the S3 Bucket holding the content
- Lambda@Edge Default Document Function, to map prefixes to a default document under each prefix.
- Lambda CloudFront Invalidate (flush) function (so we can test updates quickly) – very useful with CI/CD pipelines!
- Logging S3 Bucket
- Content S3 Bucket
Templates per distribution (per web site)
- Lambda@Edge Security Headers; with unique values per site, to fit security like a glove around the content
- ACM certificate
- CloudFront distribution (depends on the above two)
Download templates
These may need some customisation, but are a reasonable start:
Summary
Now you have a way to deploy a number of web sites, it’s worth looking at the costs, and administration overhead.
Bandwidth is always a cost no matter what the rate is, so optimising your service to reduce the size of downloads is key; not only will cost decrease, but its also going to make your service ever so slightly faster.
Serving images in current-generation formats, such as webp (instead of jpeg) may give an improvement; but you need to be confident that only modern clients are using your service. Of course, if you’re restricting TLS protocols for security requirements, then you probably already have mostly modern clients!
Even if you can’t use contemporary image formats, you can ensure that images are used in the browser at the resolution they are; we’ve seen people take the image they took with their phone at 2 MB and thousands of pixels wide and high, only to implement width and height of 50 pixels! If nothing else, ensure you’re compression of JPEGs is reasonably (you probably have a default of 90%, when 60% may do).
You should now test your public facing services with SSLLabs.com/testssl/, SecurityHeaders.com, and Hardenise.com. You may also want to hook up from browser reporting with report-uri.com as well.
Next steps
In a subsequent post, we’ll look at having Production, UAT and Development copies of our sites, as well as using CodeCommit to store the content, and CodePipeline to check it out into the various environments.